Tons of conversation in the ProWritingAid Facebook group is around outlining.
Some of our members are die-hard pantsers (they write by the seat of their pants), but it feels like more and more people are starting to see the value of a good outline.
So, when people in the group started recommending a new outlining software called Plottr, we reached out to them to find out more.
After we checked out Plottr (and loved it!), they invited us to join their affiliate program. So, if you click on a link below and end up buying, ProWritingAid will get a small commission at no extra change to you.
You will get new plotting software and support the development of your favorite editing software at the same time! But we never recommend anything that we don’t see as valuable for our writers.
In this article, Plottr’s Education Lead, Troy Lambert, walks us through the benefits of this new software below. Let’s dive in!
- Book Outlining Deep-Dive with Plottr: How to Craft Better Stories in Less Time
- Why Is Outlining Important?
- What If I am a Panster?
- Step One: Fleshing Out the Idea
- Step 2: Setting Up the Plot
- Step 3: Avoiding Plot Overload
- Step 4: Reviewing Your Outline
- Step 5: Preparing to Write
- Bonus: Rewriting, Editing, and Planning Your Series
- Find Your Outlining Style
Book Outlining Deep-Dive with Plottr: How to Craft Better Stories in Less Time
Every story starts with an idea. But that “big idea” alone is not enough. It needs little ideas that become the support system and the content of the story. Eventually, those ideas turn into chapters, scenes, beats, acts—and an entire manuscript.
But holding all of those ideas in your head long enough to write them all down is often difficult at best, and sometimes nearly impossible.
(And don’t get me started on index cards—my dogs chew those up like breakfast.)
Enter Plottr. Plottr is a visual book outlining software I use myself (and now teach authors to use) that helps you outline your plot and organize your ideas so that you stay focused and on track.
In my own experience as a multi-published author, editor, and book coach, ProWritingAid and Plottr complement each other well—especially when it comes to rewriting, as I’ll touch on later.
Let’s dive right into the formula that can help you craft better stories in less time.
Why Is Outlining Important?
We’ve all started that book where the idea seemed solid, but the elements of the stories failed to live up to that idea. Or maybe you’ve seen a movie where the story just wasn’t really there at all (I’m looking at you, Gemini Man).
Outlining and plotting your project ahead of time helps you solidify your structure, tighten your theme, and create compelling narratives.
Stronger stories increase your chances of getting published if you are following a traditional publishing route—and will get you more reviews (and better ones) and potentially more sales if you are self-publishing.
The reality is that writing (and publishing) quickly is one of the keys to being a successful author today.
Publishing on Amazon and other retailers is all about “what have you done for me lately?” You don’t want your releases to be spread so far apart that readers (or the algorithms) forget who you are between releases. Writing better stories faster is a huge plus whether you are seeking an author career or just getting started.
(And if you don’t believe me, just ask Plottr fan and author Michael Anderle, founder of the uber-popular Facebook Group 20BooksTo50K®.)
Now let’s get the next question out of the way...
What If I am a Panster?
It is often said that there are two types of writers:
1) A discovery writer or panster: Someone who writes “into the dark” with a vague idea of where they might be going.
2) An architect or plotter: Someone who plans their stories ahead of time with varying levels of detail.
The truth is: these two types of writers aren’t as different as you might think.
Pansters plot, just at a different time. In fact, they probably plot on the second or third draft, and they are likely plotting as they go.
If you’re a panster, here’s how an outlining tool like Plottr can speed up your process:
Use a loose outlining method, like Take Off Your Pants, and go from there: Libbie Hawker’s acclaimed methodology will at least give you a bare-bones outline to work from.
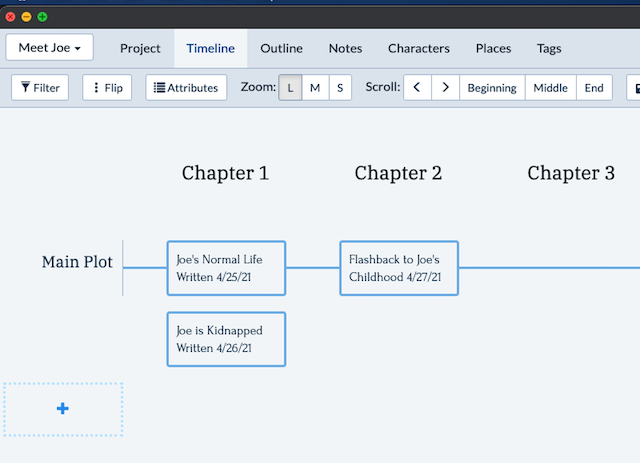
Plot your scenes as you write them: After every writing session, put a synopsis of your scene in Plottr, like the screenshot below. This way you are building the elements of an outline you can use later.
Plot your book after you write the first draft: Take all those scenes, put them on a Plottr timeline, and see how you did. Are there plot holes? Is the inciting incident soon enough? Can you discard those exposition scenes?
The point is, some amount of outlining is valuable, even if you are a discovery writer.
In fact, some of the outlining steps below are ones that a discovery writer might do when writing their first draft, and you can accomplish all of these things using Plottr.
Step One: Fleshing Out the Idea
The first thing you want to do is to unpack your ideas.
Depending on how you get and develop your ideas, you can complete the following steps in any order that works for you. For some writers, the characters come to them first, and then they develop ideas around them. For others, the story develops the opposite way: they get ideas for plots or situations first, and then they populate that world with characters.
Both approaches work, and both start like this:
The BIG Idea: This is the idea (or character) that kicks it all off. This is the general idea for your story. When an author says they have “enough ideas to last a lifetime” they are usually talking about this sort of BIG idea.
The Little Ideas: These are the ideas that follow the question, “And then what happens?” There are countless books on how to answer that question, and how to introduce things like hooks and other plot points that keep your reader on their toes.
Plottr helps you stay on track with the BIG idea by helping you organize the little ideas while keeping everything straight in your head so you can do the most important thing: write.
You can start this process in any order you want, but since we have to start somewhere, we’ll talk first about world-building, i.e. the ideas you have about the setting.
World-Building in Plottr
Your setting can be a big idea or a little idea, but either way, you can set it up in Plottr. At the very top of your project, you will see a “Places” tab. When you opt to create a new place, it will look like this:

You will see some simple things you might want to include about a place right away: a name, short description, a place for an image, and notes (where you can also add more images).
For world-building aficionados, you can customize your places and add more details using Plottr’s “attributes” tool.
When you open the Attributes dialog box, it will be blank until you add some attributes of your own. What do you need to know about each place in your story?
Perhaps the easiest way to understand this is to look at an example for our demo of The Three Little Pigs story:
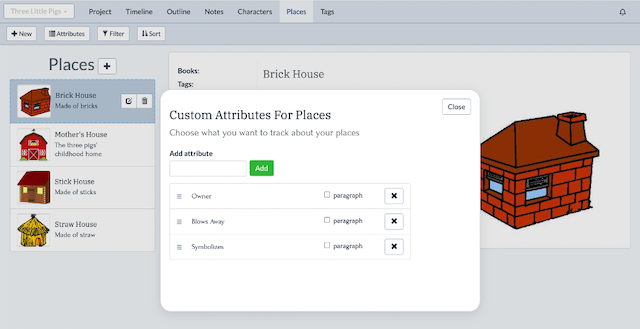
For that story, we want to know who owns the house, if it blows away or stands up to the wolf, and what it symbolizes.
The card for the Brick House would look like this:
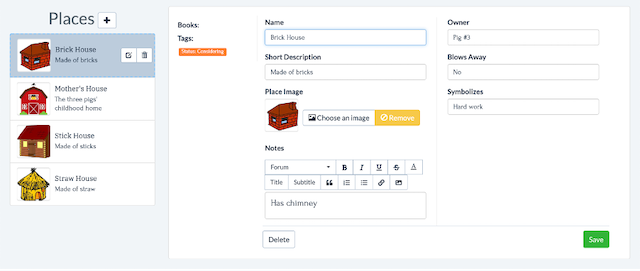
The nice thing about Plottr is you can add any attribute you like, any number of photos in the notes section, and even links to research you may have done about a particular place. All of this reference information remains at your fingertips as you write.
What you can do for places, you can also do for characters.
Character Development in Plottr
Whether you start with characters or with places, the same tools are available for both, with one difference. Let’s take a quick peek at what the Characters section looks like:
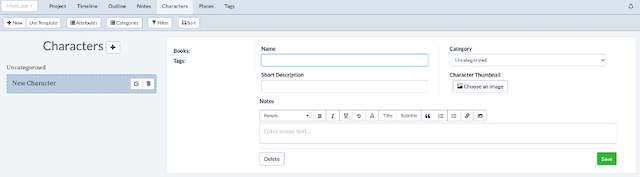
When you click on “new” to create a new character (or the plus button next to the title) you will see the screen above. Notice how similar it is to the places area? However, there are some extra features.
Just as with places, you can add custom attributes for characters, everything from hair and eye color to personality type.
Here is our example from The Three Little Pigs:
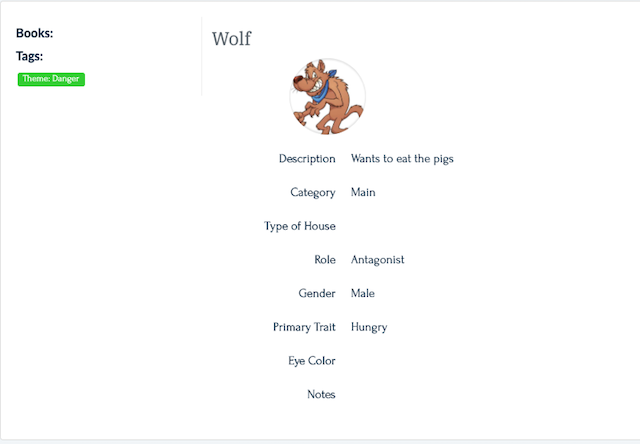
Note that we’ve added custom attributes just like we did with places that matter to our story about each character, including the role in the story (in this case, antagonist).
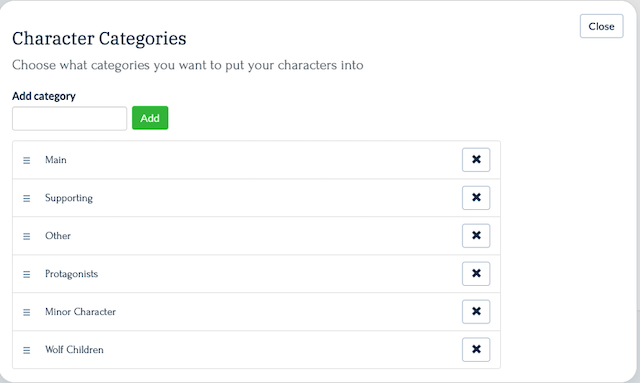
But also notice something else: we can also add custom categories for our characters. We start with Main, Supporting, and Other categories, but there are many more than that we can add.
Below you can see I have added the Protagonist, Minor Character, and the Wolf Children that will inevitably populate the sequel, Revenge of the Wolf. (“My name is Inigo Wolftoya. You killed my father. Prepare to die.”)
Keeping your characters together like this reminds you to make sure that every character serves your story.
Do you know what role your supporting characters play in your story arc? Use this checklist to make sure they are enriching your story at every stage.
Just like with places, you can add notes, additional photos, and anything you might want to have handy to your character card in Plottr. This way you can easily avoid the dreaded “Were her eyes green or blue?” question, and keep your writing consistent.
What about other research though? Research not related to places or characters? Where does that go?
Using Notes
What is the notes section for? Well, anything that doesn’t fit in the character or place tabs.
For instance, you could be doing research into police procedures for your next serial killer thriller. Or perhaps you need to list various poisons and weapons a killer might choose. That research can all go in the notes section.
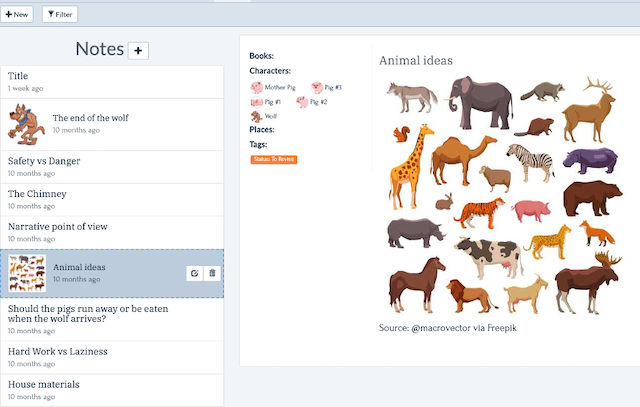
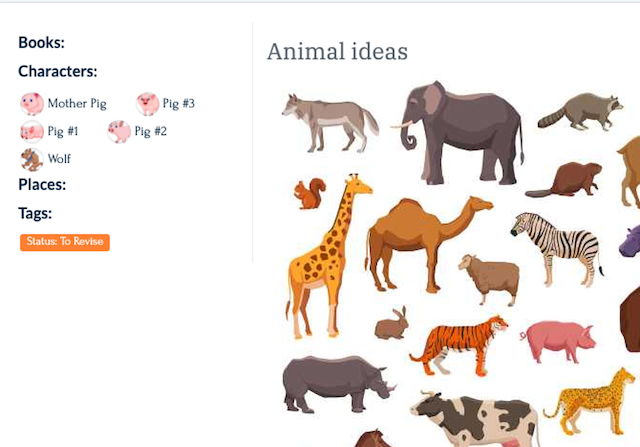
It’s also a great place for brainstorming ideas:
- What POV will the story be told from?
- Who will the narrator be?
- What is the theme of your story? Is there a moral?
- Should we write The Three Little Camels instead of The Three Little Pigs?
- Do wolves even eat camels?
As you can see from the diagram above, we used notes to determine what our story would really be about, from thematic questions to house materials and more. This is your space, and you can organize your notes here with photos, descriptions, and more.
Step 2: Setting Up the Plot
Once you have those basic ideas in place, you will want to set up your plot.
This is the skeleton of your story body and the roadmap that leads to the treasure of your ending. There are a few ways to go about this, and you can choose the one that works best for you.
The first choice is whether to follow an established story structure or to embark without one, using your finely honed writer instincts. Alternatively, you can also create a story structure all your own, and follow that template.
There are two main ways to start a Plottr file. You can use a template, or you can start a blank file. The example we used for discovery writers started with a blank template, and we added scenes and timelines as needed.
However, instead of putting in what we already wrote on a particular day, here we put in what we are planning to write that day. This can work particularly well if you have a good idea of where you’re headed and you have a good sense of story structure, or just like to plan your work ahead of time.
Working out what and when you can write each day takes practice, and sticking to that plan can be challenging. Using the right tools and working out your motivations will help you stay on track.
If you need help or inspiration, Plottr has multiple pre-created plot templates from bestselling authors and experts. You can use these templates as a guide when you create your stories.
As an example, let’s look at the “Romancing the Beat” template based on the popular book by Gwen Hayes:
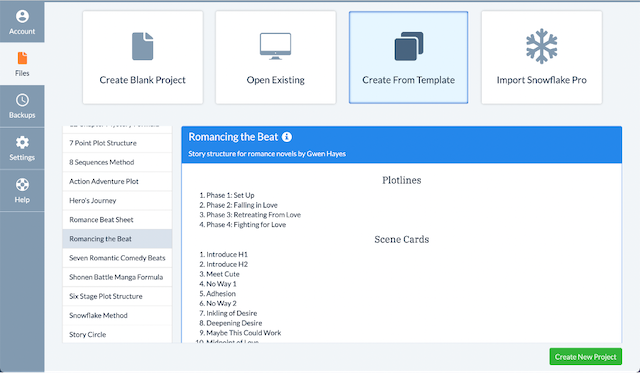
On your Plottr dashboard, you can preview what each template contains. In this case, we are creating a 20 beat “plot” with a set of scene cards with specific instructions.
Each scene card includes a description of the action that should take place at that point of the story:
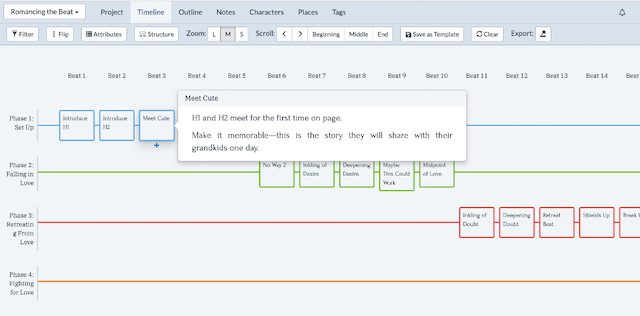
If we hover over a scene card, we can see particular directions. You can outline your story using this guide as a pattern—almost like a writer’s version of paint-by-numbers!
Note that when creating scenes, you can also add attributes, just like you did with characters and places. There are even some templates for these attributes, like this Scene Essentials Template:
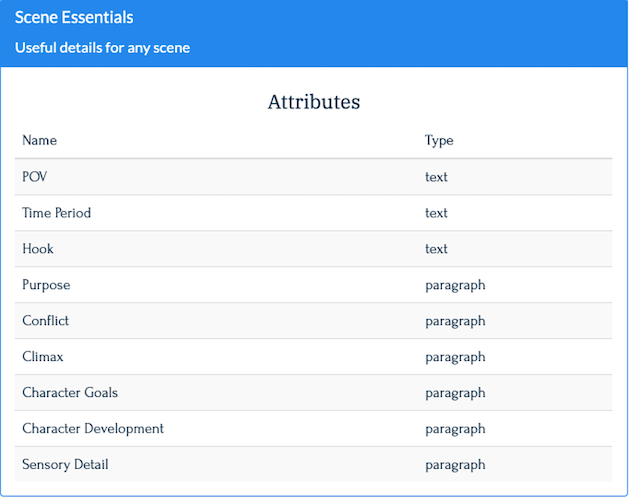
This includes details you might want to use to describe almost any scene. But if these aren’t enough, you can add additional custom attributes like goal, motivation, country, planet, or any other detail that might relate to your story.
You can also use more than one template to manage your storylines. So for example, you may have chosen the 12-chapter mystery plot as your primary story structure, but your story also has an element of romance. You can add a template by hovering over a second timeline and choosing “Use Template” as shown below.
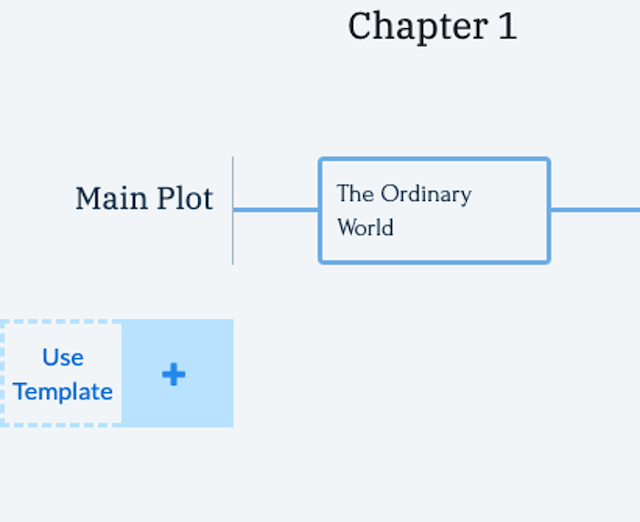
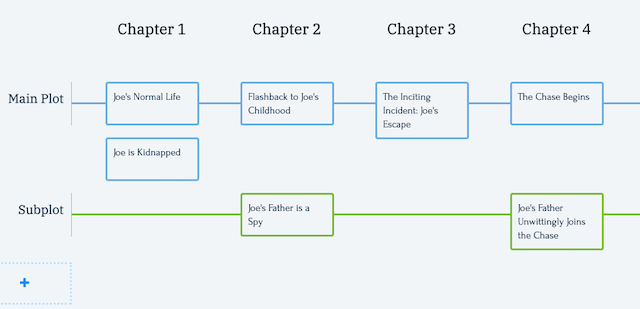
When you “stack” two templates, one for your main plot and the other for your B-story, it might look something like this:
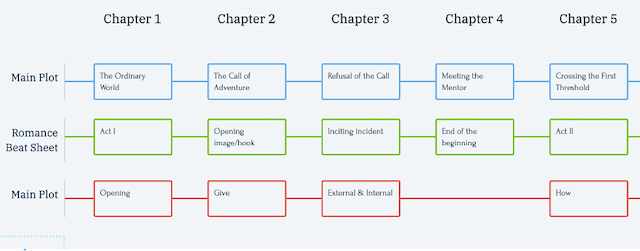
In this case, we chose the romance beat template, which coincidentally has the same number of beats as our story has chapters. Now we can work on how the two of them line up, and how those beats can fit together to make your story better.
This is just one method of managing multiple storylines, and Plottr makes that easy. Just add an extra timeline for B-Story or any additional plotline, and you can keep track of your scenes and beats to ensure they align and don’t conflict with your main plot.
Step 3: Avoiding Plot Overload
Plottr offers additional ways to keep your story organized. You can do this by creating tags, which can be used to filter your timelines, places, and characters. You can create tags for almost anything.
Here’s what this looks like in the notes section of our Three Little Pigs demo:
You can create as many tags as you want. Here are some examples from that same project:
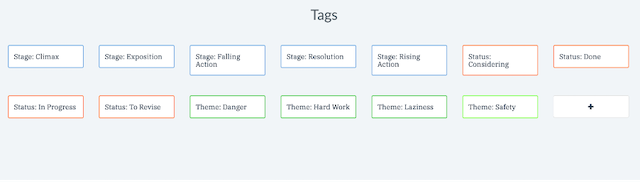
You can change the color of the tags and create them for any reason from theme to writing stage as seen above, or any other way you might want to organize your story.
You can then filter your timeline, characters, places, and notes based on those tags to see how your project is developing and where you might need to add or remove certain details.
For example, you can filter your timelines to only show scenes related to your tags (such as “rising action”), specific characters, places, or more. You can also select more than one tag to filter on so that any item showing must meet more than one criteria.

The takeaway here is that you can organize your story in almost any way that you like!
Step 4: Reviewing Your Outline
Plottr also provides an outline view that is automatically generated from your timeline. This displays your visual plot in a more standard linear outline format, like the one below.
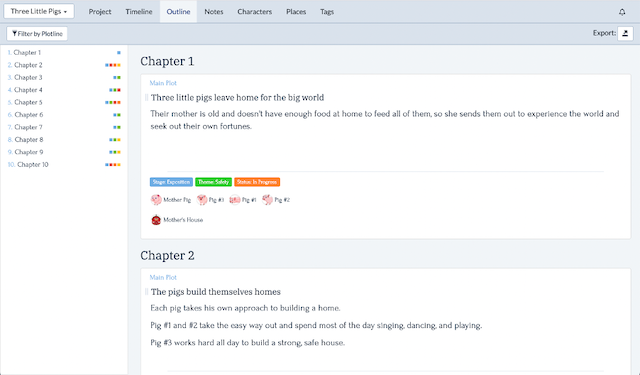
You can make changes in this area, and the same changes will be reflected on your timeline. You can also add text here, as well as reorder your scenes. One of the coolest features in the outline section is the ability to filter by plotline, shown below.
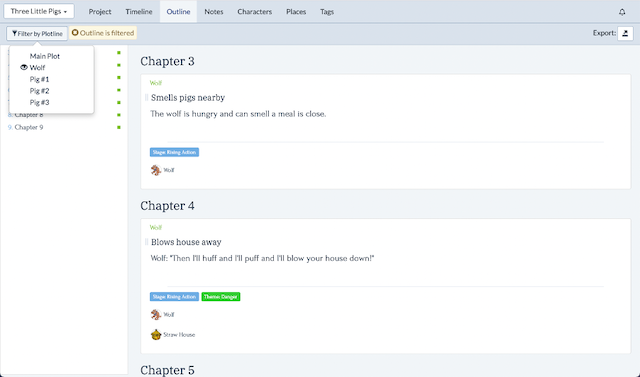
If you have multiple plotlines in your story, this can be an easy way to check your work for plot holes or inconsistencies.
For example, it would be obviously nonsensical if your story accidentally had the wolf angry at not being able to blow the Brick House away before he even tried.
Once you’ve checked your work, let’s start writing!
Step 5: Preparing to Write
It’s time to grab the beverage of your choice, put on some music, and get working. How do you transfer your outline from Plottr to your favorite writing software?
The export functionality lets you quickly send your plot from Plottr to Scrivener or Word. The feature is not only robust, but you can also customize what you export, and this feature is getting better with every software update.
Here’s what it looks like:
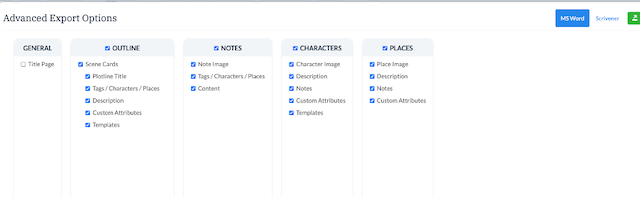
Once you have your work in your preferred writing software, you can use the tools in Scrivener or the Navigation Pane in Word to navigate and write your work, using the same process you always have.
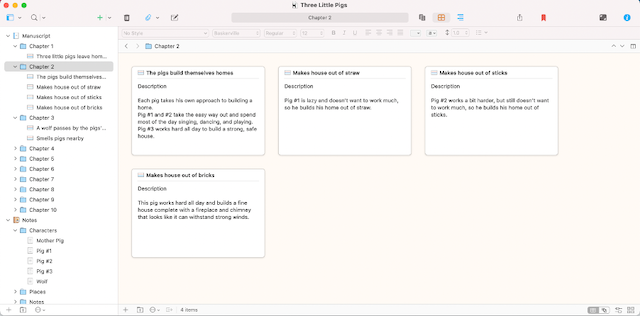
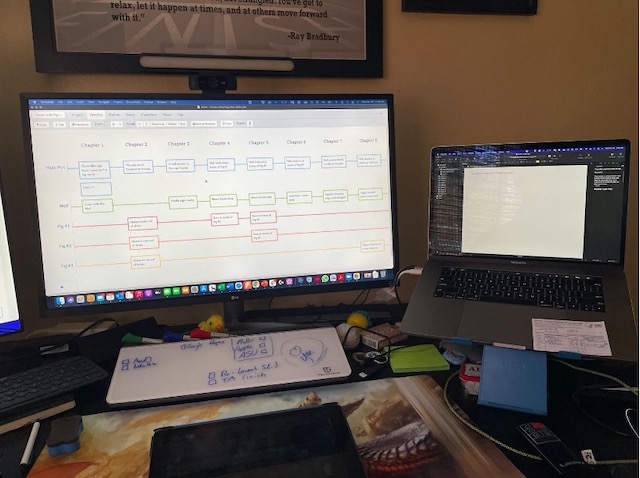
Pro Tip: Even though I export my work to Scrivener, I put Plottr up on one monitor, Scrivener in the other, and write that way. Then I have any notes at my fingertips in Plottr without leaving the writing window of Scrivner.
Now you’re off and writing! You completed the planning stage and you’re ready to start writing your first drafts without the sinking worry of a plot hole creeping in.
Bonus: Rewriting, Editing, and Planning Your Series
Fun fact: when you are done writing or even ready to plan the next book in your series, Plottr is still there to help you. It can make rewriting and editing faster as well.
Here’s how:
- If you’re a discovery writer, it’s now time to tear your first draft apart. Did you follow your plot or outline exactly? Probably not. You can see if those changes match with your plot and pacing, and make sure you stayed on track.
- Some authors revise their Plottr file as they write to keep themselves from going off the rails in the first place.
- You can also check your first draft, fill in holes, and delete unnecessary scenes.
Once you’ve finished your first draft, you can use ProWritingAid to check the language. Did you repeat words and phrases? Use too much passive voice? How is your dialogue?
I’d recommend using the information from Plottr and ProWritingAid to revise or rewrite as needed. This way your draft is done faster, cleaner, and better overall.
Lastly, you can also use Plottr to outline not only a single book, but also an entire series. If you click on the Project tab, you will see (as in the example below) that you can add books, create timelines for those books, and even create an overall series timeline.
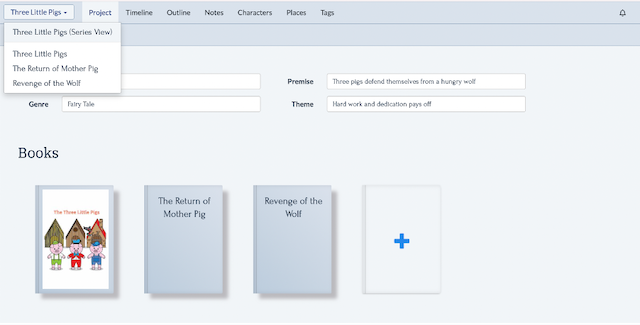
Plus, in your Plottr file, you can filter characters and settings by the book in which they appear, so when you are writing your first draft you only see the characters and settings relevant to your current story.
From idea to draft to revision, Plottr is a fabulous tool to help you craft better stories in less time.
Find Your Outlining Style
No two writing processes are the same, and that means that outlining styles vary wildly too. If you’ve been unconvinced by outlining in the past, hopefully some of the ideas and approaches Troy mentioned above will spark a new passion for plotting.
An outline helps you avoid plot holes, keep track of timelines and organize your research so you can focus on your writing.
When it comes to the editing stage, you’ll spend less time puzzling over missing story beats and continuity errors, meaning you have more time to make sure that your word choices, readability, pacing, and other key areas are taken care of.
If you’d like to try outlining with Plottr, download their 30-day free trial. We think this software provides a great framework that allows you to try out multiple methods in the same book.
Try it out and let us know what you think in the comments!
Looking for more info? Join us for this live session.
May 27: How Plottr Can Help You Outline Your Novel (2PM ET / 7PM UK)
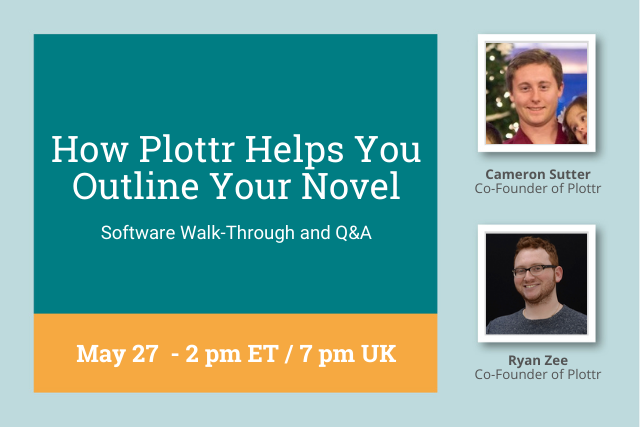
We’ve invited the founders of Plottr, Cameron Sutter and Ryan Zee, for an exclusive event to show you how their popular software can help you craft better stories in less time.
You’ll discover how you can use Plottr to visualize your plot points, organize story lines, create your story bible, track your characters and settings—and fast-track your outlining process with popular story templates like "Hero’s Journey" and "Romancing the Beat."
Don’t miss this chance to ask the developers questions and see a great tool for writers in action.

Be confident about grammar
Check every email, essay, or story for grammar mistakes. Fix them before you press send.