Scrivener is a brilliant tool for organizing your ideas and writing long form stories. Before you get to writing, though, you need to outline, and Scrivener comes in handy here too.
Here at ProWritingAid, we know that lots of you use Scrivener for your writing projects (it integrates perfectly with our Desktop App!), so we invited founder of Well-Storied.com and all-round Scrivener expert, Kristen Kieffer, to show us how to outline with Scrivener.
In this article, Kristen gives you a complete guide to outlining your novel with Scrivener. You’ll need a little background knowledge of how Scrivener works to get started, but then you’ll be ready to start outlining like a pro with this ultimate guide.
Plus, read to the end to get an exclusive discount on her Storytelling With Scrivener eCourse!
Over to Kristen!
Outlining a long-form project can be a tricky part of the writing process. Thankfully, with Scrivener’s Outliner and Corkboard modes, planning your next novel or non-fiction book doesn’t have to be a frustrating experience.
Both Scrivener’s Outliner and Corkboard allow you to view the whole of your project at a glance—creating, cutting, and organizing new chapters and scenes with ease. To make the most of each option, let’s explore Outliner and Corkboard modes together.
Organizing Your Manuscript in the Scrivener Outliner
Outliner mode is the perfect tool for detail-oriented writers who love using spreadsheets and metadata to organize their projects.
To view your project in the Outliner, first select the manuscript folder in your Binder. Then click the “Outliner Mode” icon in the default Scrivener Toolbar. You can also access Outliner mode by selecting View > Outline.
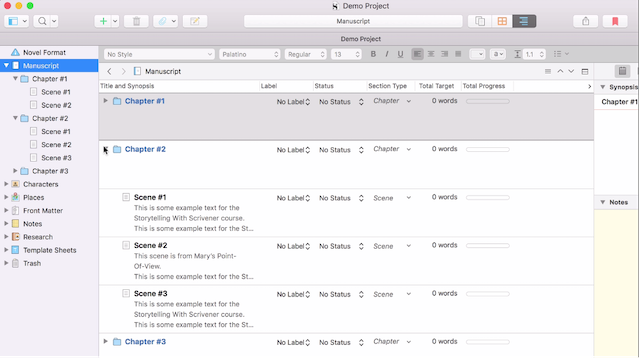
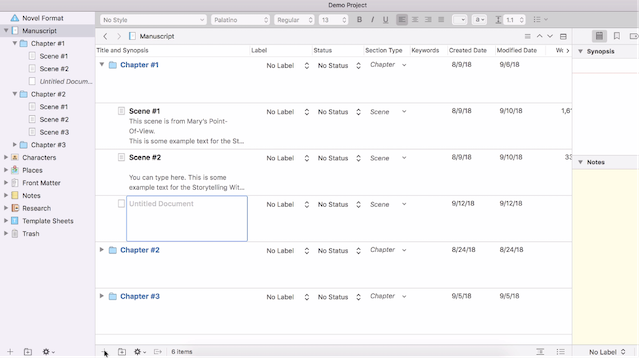
In the Outliner, your manuscript’s folders and documents appear in the editor as the first column in a spreadsheet, with several additional columns offering more information about each folder and document. By default, these columns include each item’s label (e.g. scene, notes, color label), status (e.g. to do, first draft, revised draft), and section type (e.g. table of contents, scene, acknowledgements).
Customizing Outliner Metadata
To customize the columns shown in the Outliner, select the small arrow icon in the column header to open a menu of metadata options. To add or remove a specific type of metadata from the Outliner, simply toggle the related checkbox within the metadata menu.
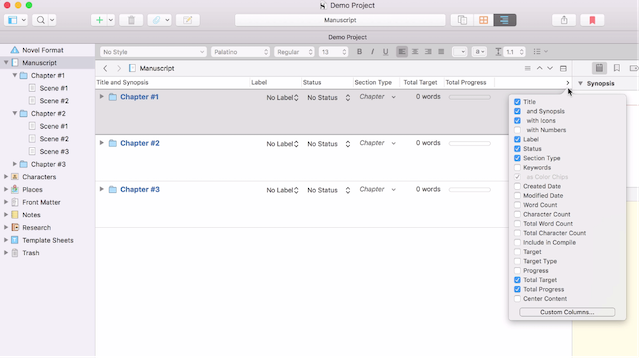
Metadata options include the date the item was created or last modified, the item’s total word count or target word count goal, whether or not the item should be included in compile (i.e. export), and the item’s section type, which determines how the item is formatted during compile.
Pro Tip: You can even create custom metadata columns to add to your Outliner. To learn how, check out the “Utilizing Custom Metadata & Project Keywords” lesson included in the Storytelling With Scrivener eCourse.
Changing the width of a column within your Outliner is easy. With your mouse, simply hover over the column divider until the double-arrow icon appears, then click and drag the divider to resize the columns.
Utilizing the Outliner Footer Icons
To add additional documents or folders to your Outliner, first select the item immediately above where you’d like your new item to appear. Then head down to the Outliner footer and click the + icon to add a new document (or the folder icon to add a new folder). Alternatively, head up to the Scrivener navigation bar and select Project > New Text or New Folder.
The third icon in the Outliner footer opens the same options menu that can be found by right-clicking on a document or folder. The fourth icon indicates whether an item in the Outliner, when selected, would open in the primary or secondary editor. If you aren’t sure how to view multiple editor windows in Scrivener, check out the “Splitting the Editor” lesson in Storytelling With Scrivener.
Finally, on the right-hand side of the Outliner footer, you’ll find two additional icons. Selecting the first allows you to toggle between centering and left-aligning the columns in your Outliner. The second icon determines whether your items’ synopses are visible beneath their respective titles.
Adding a Synopsis to Your Outliner Items
You can easily modify the title and synopsis of an item in your Outliner by clicking on its text. Adding a synopsis, however, requires a few more steps.
First, in the Outliner, select the document or folder to which you’d like to add a synopsis, then open the Inspector by selecting the blue “i” icon in the Scrivener toolbar. Select the “Notes” tab in the Inspector to access the “Synopsis” pane, where you’ll now type your desired synopsis. This new synopsis should also appear in the appropriate spot within your Outliner.

You may notice that the Inspector’s “Synopsis” pane looks a bit like a miniature index card. That’s because you can also add a title and synopsis to a document or folder within Scrivener’s second great outlining tool: Corkboard mode.
Utilizing Scrivener’s Corkboard Mode
Corkboard mode is the perfect digital outlining and organization tool for visual processors because it mimics the look of a physical corkboard and index card set-up.
To access the Corkboard, first select the manuscript folder in your project Binder. Then select the Corkboard icon in your Scrivener toolbar or head to View > Corkboard. Corkboard mode will now appear in your primary editor.
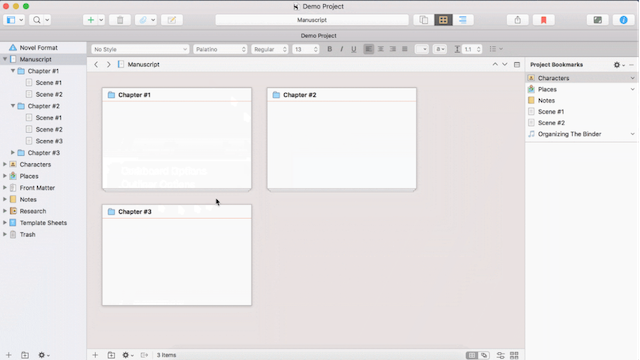
Any subfolders within your manuscript appear in Corkboard mode as stacks of index cards, while documents appear as individual index cards.
Clicking once on an index card highlights the card and opens its metadata in the Inspector on the right-hand side of your screen (if your Inspector is currently visible). Double-clicking on a card opens that folder or document in the editor, allowing you to revise its contents.
Adding Text to Your Index Cards
Clicking once in the header of an index card allows you to retitle your document or folder. Note that this change will be reflected in both your Binder and Outliner, as each tool is simply a different way of viewing the contents of your manuscript.
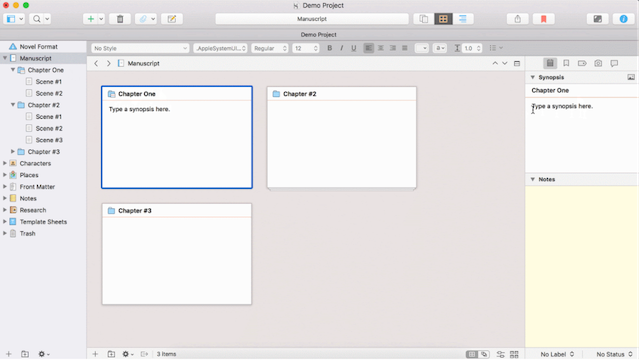
Clicking once in the body of an index card allows you to type or revise the synopsis for the item the card represents, a change that will also reflect in the “Synopsis” pane in your Inspector and the synopsis column within your Outliner.
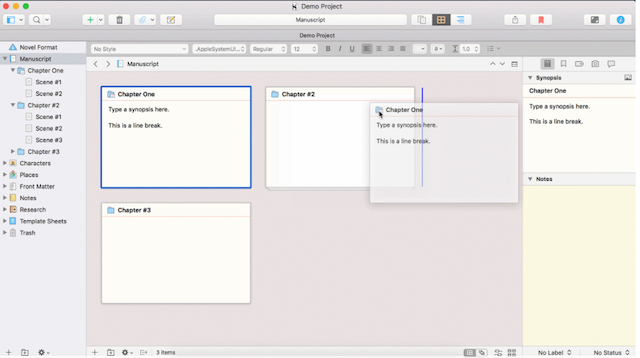
Pressing “enter” or “return” on your keyboard while typing within an index card will save the synopsis you’ve written. To create a line break while typing within an index card, hold the “alt” or “option” key then press “enter.”
Adding & Rearranging Index Cards
To create a new document or folder in the form of an index card, simply select the + icon or folder icon in the Corkboard footer.
You can also rearrange the order of your index cards by clicking and dragging a card to your desired location. But bear in mind that any changes you make within the Corkboard will also impact those items in your Binder and Outliner.
Mind-Mapping with the Freeform Corkboard
On the right-hand side of your Corkboard footer, you’ll find two icons that allow you to toggle between grid and freeform Corkboard formats. Grid format aligns your index cards in orderly rows and columns, while freeform format allows you to drag and place cards wherever you’d like—even overlapping cards, if you so desire.

Rearranging index cards in the freeform Corkboard won’t impact the order of the documents and folders in grid format (or within the Binder and Outliner) until you press the “commit” button at the bottom of your screen. This option is especially great for writers who love to mind-map or otherwise brainstorm ideas visually.
Customizing Corkboard Mode
Next in your Corkboard footer, you’ll find an “Arrange By Label” icon. Selecting this icon will group your Corkboard cards according to the labels you’ve assigned them.
If a card has a label, then the color associated with that label should appear on the edge of the card regardless of whether you’ve selected the “Arrange By Label” icon. If you don’t see these label colors, select View > Corkboard Options > Show Label Colors Along Edges.
To apply a label to an index card, first select the card in your Corkboard. Then, in the options menu on the left-hand side of your footer, select “Label” and choose the label of your choice from the dropdown menu.
Finally, on the right-hand side of the Corkboard footer, you’ll find the “Corkboard Options” icon that, when clicked, reveals a few customization options.
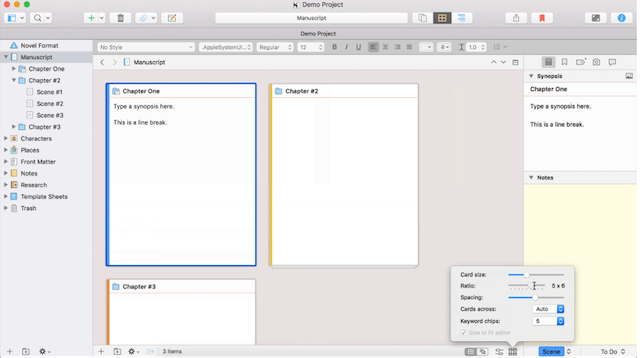
Here you can alter the size, ratio, and spacing of your index cards, decide how many cards should appear in each row, and choose how many keyword color chips should appear on each card.
If you don’t see your Keyword color chips on your index cards, then you can activate them by selecting View > Corkboard Options > Show Keyword Colors. In this same menu, you can also activate Status Stamps, which applies the status you’ve assigned each item overtop its respective index card. To learn more about labels, statuses, and keywords, check out the corresponding lessons in Storytelling With Scrivener.
Scrivener Makes Digital Outlining Easy
Though Scrivener’s many features can be overwhelming at first glance, the fact that this app was designed with long-form content in mind means that novelists, memoirists, and other writers penning full-length books no longer have to juggle countless digital and physical documents. Scrivener’s Outliner and Corkboard modes make outlining and restructuring manuscripts a cinch, just as Snapshots and Revision Mode simplify the editing process and Composition Mode helps writers find their flow—among countless other helpful tools.
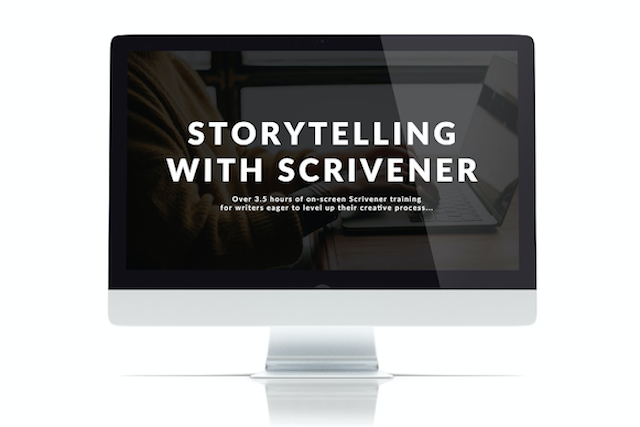
To learn more about how you can make the most of this incredible app for writers, check out Storytelling With Scrivener. This self-paced video course contains over 3.5 hours of on-screen Scrivener training. Learn how to navigate the Scrivener interface, make use of its various tools and functions, and customize its features to best serve your unique needs as you work to bring your stories to life. ProWritingAid readers save 20% on enrollment using the code PROWRITING20 at checkout.

Be confident about grammar
Check every email, essay, or story for grammar mistakes. Fix them before you press send.