Why read a book when you can listen to it?
There are many readers out there who feel that way. For writers like us, that’s a perfect opportunity to expand our listenership, plus discover a new art form we might not otherwise try. I’ve been recording audiobooks for several years now, so I’d like to share my five top tips with you. Hope they help!
Tip 1: Start with Your Space
Just like the setting of your book, the setting of your recording is essential to success.
Let’s start with what we don’t want: open spaces, echoes, hissing radiators, anything like that.
Enclosed spaces are best, so if you’ve got a small bedroom, or better yet, a closet, you’re in business. If you don’t have access to such spaces, you could make do by recording underneath a blanket, soundproofing a room, or renting a dedicated recording space.
Whatever area you choose, rely on trial and error. Record in different conditions, then play it back and see what sounds best.
Tip 2: Choose Your Software & Hardware
Though I suppose you could record on tape or a record or something, that’s a bit outside the purview of this article. I recommend digital, starting with GarageBand or Audacity. The former comes standard on Mac computers, while the latter is a free download for both Mac and Windows. Both are great starters because they’re free and effective. There are more expensive, more powerful apps, but I wouldn’t recommend paying for them until you're more experienced. Plus, Garageband and Audacity are relatively easy to use.
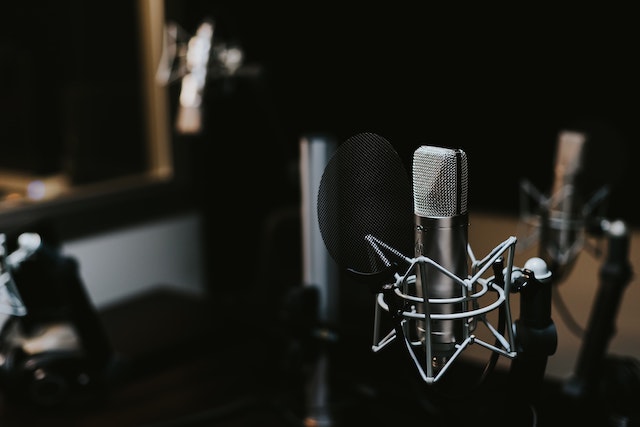
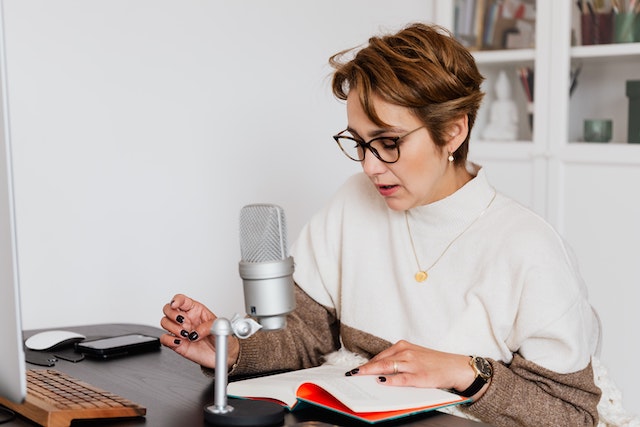
For your hardware, an external microphone is pretty much essential. No one wants to listen to an audiobook recorded with a laptop’s on-board mic or a cell phone. Fortunately, external mics are plentiful and relatively inexpensive. Again, I recommend starting cheap and working up to more expensive options when you’ve got your feet under you. The Blue Yeti, for instance, is an excellent USB microphone for just over $100.
You’ll also want a pop filter. Those are the screens you see protecting mics (refer to the above picture in this article). Pop filters reduce the impact of hard and breathy syllables on your microphone, which often happen with "P" or "Wh" sounds. They’re affordable, starting at around $15. You can even make your own!
Tip 3: Set Your Tone
I know you’re excited for the actual recording part. I am too. But you can’t jump into the performance just yet. First, you need to set your levels and establish room tone.
For levels, stand at different distances from the mic and see how things sound. Note the sound meter on the side and try to stay at a consistent volume. If the meter stays mostly green and occasionally yellow, you're probably good. Red is too loud, and you might be standing too close to the mic. Conversely, if you can barely hear yourself, you’re probably not close enough. Again, trial and error. Just tinker until it sounds good.
Now, about room tone. Room tone is essentially the sound of silence (in your recording space). You don’t want any background noise, but even silence sounds different in different spaces. Getting room tone is important so you can splice it over background noises or mouth sounds.
Tip 4: Test Your Performance
I say performance because you really are performing your book. It’s not just about reading it; it’s about projecting your excitement for your words onto the listener.
The best way to learn how to perform an audiobook is to listen to many of them. You most likely already do so, but if not, definitely give audiobooks a try. Listen to the way those narrators read different passages. You’ll notice how they change their pacing for exciting passages, or slow down for more somber ones. Note how they approach character voices, or how they might vary their approach across genres. Try emulating techniques of established narrators, especially when you’re first starting out.
Now apply what you’ve learned to your reading. Record yourself and play it back. Keep the parts you think are working and delete the ones that aren’t. Since you’re digital, you can always re-record lines and dialogue if you don’t like them.
For example, try recording difficult lines in several ways. This most often comes up in dialogue, but it can be helpful in narration as well. For example, consider this line:
The dog barked at the cat, but the cat couldn’t care less.
(This story is ripped from the headlines, since it happened in my house this morning.)
When you record this line, where are you putting most emphasis? Are you putting it on barked? How much are you spacing out those final three words? And how long are you taking on the pause for the comma? Also, what is your tone while you’re recording this line? Is it playful? Is it silly? Or will you try to match the cat’s mood by reading with a slight air of disdain?
You may not consciously consider all these questions, and that’s totally okay. In fact, if you are, you may never get through your audiobook. However, this is where it can help to record several lines. If you’re unsure how it should sound, try it a bunch of different ways all in a row. Then play back what you have and use what you like best. Discard the rest.
Tip 5: Post-Production Polishing
Once you’ve concluded recording, it’s time to edit.
For starters, scrub out background noise. You might get some lip smacking, sighs, or rustling of clothes between lines. Those are easy enough to remove. Simply copy and paste your room tone over these noises, then trim to cover them.
To be clear, this only fixes standalone background noise. In other words, if your dog barks over your recording, it can’t be salvaged. You need to record that line again!
But don’t worry. Re-recording is inevitable. While you listen back to your recording, I guarantee you’ll find places where you misread your work, for example, "she climbed up the stairs" instead of "she climbed the stairs."
Now you might think such a minor difference wouldn't be a big deal. For Amazon, it can be.
Whispersync is a cool bit of Amazon sorcery that allows readers to pick up where they left off, no matter whether they’re reading an eBook or listening on audio. Therefore, it’s essential that both versions of your book match perfectly. If you’re missing a word here and there in the audiobook, the technology may not sync well and your readers might not get an optimal experience.
In post production, you’ll also want to make any edits you need to your audio levels. Remember, avoid flares of sound and keep the volume relatively consistent. Reduce volume where appropriate, but you’ll run into trouble if you try increasing the volume on parts that are too soft. The more you increase the volume, the more background noise you’ll get.
The best thing you can do here is simply trust your own judgment. If you like what you’re hearing, chances are your listeners will as well.
Bonus Tip: Enjoy!
Audiobook narration is a blast. It can be a daunting task to get everything set up and going. But once you do, I think you’ll find it’s a rewarding experience. Have fun with it, and enjoy yourself!

Be confident about grammar
Check every email, essay, or story for grammar mistakes. Fix them before you press send.